How to Clean Your Carpets: A Step-By-Step Guide
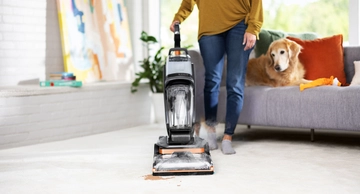
Whether you love or hate to clean your carpet, the fact remains: Those stains, pet tracks and fur balls aren’t going to remove themselves. Luckily, lifting the yuck out isn’t hard when you have the right tools and equipment. Our chemists like to say that you don’t wash your clothes just by brushing them off; you clean them with soap and water in a machine. Carpets need the same treatment to stay fresh and clean.
While vacuuming does get rid of loose debris, like dirt, dust and hair, there are other types of dirt that vacuuming cannot reach. Deep down in the fibers of the carpet is where more dirt likes to hide. That’s why the carpet cleaner was invented! If you can’t get down deep enough into your carpet, you’re not getting a true clean.
We get a lot of questions about the best way to clean carpet. We’re here to help by sharing expert guidance on getting your carpets back to a happy place and feeling confident that you’re doing the most effective thing to keep your home clean.
Project Overview
Cleaning Time: 1-2 hours
Drying Time: 12 hours
Total Time: 13-14 hours
Difficulty: Medium
Everything You’ll Need
Equipment and Tools:
Vacuum Cleaner
Upright Carpet Cleaner
Supplies
Stain Remover Spray
Carpet Shampoo
Paper Towels
Used Rags or Shop Towels
Step 1: Move Your Furniture
This step may seem obvious, but it’s worth mentioning. Not only does removing your furniture from the room enable you to clean your carpets from wall-to-wall, but it also helps you avoid potentially damaging your furniture with moisture from your carpet cleaner. Make sure you find a friend for team-lifts of larger pieces and place your furniture in an area that you can easily navigate your machine around.
Step 2: Put Your Vacuum Into Action
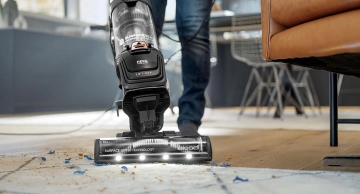
Vacuum to suck up fur, kibble, and all those other surface bits. Once your furniture is moved, you may realize that they have been hiding messes regular vacuuming can’t reach. BISSELL® vacuums come complete with powerful brush rolls to thoroughly clean carpets and soft bristles for vacuuming hard floors, so they can pick up everything from fine dust to larger debris. Vacuuming before a deep clean ensures that most of the dirt is removed first, ensuring a quicker deep clean. Plus, vacuuming first helps reduce the potential of clogging in your deep carpet cleaner since it removes some of that larger debris.
Step 3: Pretreating Deep Stains and Problem Areas
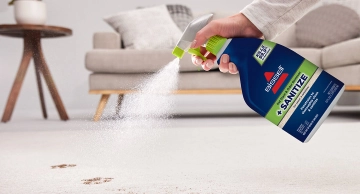
Hone in on spills and pesky pet tracks, and give them a little extra love. Similar to how you pre-treat laundry, you may also need to pre-treat your carpet with stain removers. This extra step helps loosen tricky stains. A few sprays of stain remover like BISSELL® PET PRO OXY Stain Destroyer directed at your problem spots will do the trick. This formula (without any heavy metals, phosphates or dyes) will even help remove odors.
Step 4: Prep Your Machine
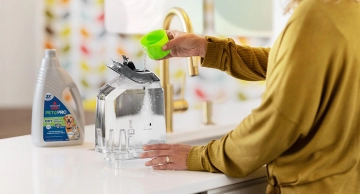
After you get out your carpet cleaner, fill the clean tank to the line with hot (not boiling) tap water. Add formula to the tank according to the directions. It is important to use carpet cleaner shampoo that is specially designed to go with your machine. Upright carpet cleaners use a different formula than portable carpet cleaners. Using the correct formula will deliver optimal cleaning results and prevent damage that can occur with other solutions. BISSELL® PRO MAX Clean + Protect is the best option for removing grub and grime, with added protective qualities to repel future stains. BISSELL® Pet Stain & Odor formula helps to remove tough odors and stains often left behind by pets.
Step 5: Deep Clean
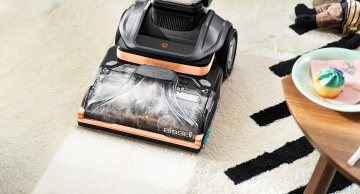
Start cleaning your carpet in the opposite corner from the door so you leave yourself an escape route and avoid having to walk across wet carpet. We recommend cleaning forwards and backwards with the trigger pressed down to release solution on the floor, and once with your hand off the trigger to suck up and remove the formula and grime. The first pass sprays solution into the carpet while the second pass allows extra suction to pull up any remaining moisture. Even better, the brush rolls are scrubbing out the dirt and stains the entire time!
If you want to up your game, try BISSELL® Revolution® HydroSteam® upright deep cleaner, a new innovation in carpet cleaning with three modes to help you: Steam Pretreat Mode to loosen tough pet messes, SteamWash™ Max Clean Mode to amp up cleaning power and Quick Dry Mode for extra-speedy drying.
Pro tip: You can clean in both a forward and backwards motion. We recommend counting to two for each step you take. This gives your carpet cleaner time to scrub an area and suck up more moisture.
Step 6: Rinse Your Carpets (Optional)
If you have time, you can go back over the cleaned carpet again with only hot tap water in the tank (no formula this time). This will remove any leftover formula and give your carpets an extra clean. Like in Step 5, we recommend running your machine over the area once with the trigger pressed and once without to suck up any remaining water.
Step 7: Let Your Carpets Dry
Drying time will vary by the type of carpet, thickness of your carpet, the number of times you go over an area without spraying, and the humidity and air circulation in the room.
In general, wait four to six hours before walking on the carpet after deep cleaning. It may take up to 24 hours to fully dry.
If you need to dry your carpets quickly, try one of these methods:
Use a garage-style wet/dry vacuum: Using a garage-style wet/dry vacuum to suck up excess moisture is a great first step in drying your carpets quickly. Combine with one of the other methods below for best results!
Open your windows: Opening your windows helps your carpets dry by reducing the moisture in the air and creating a crosswind. This method is especially effective if combined with fans. We don’t recommend opening your windows if it is humid outside as this may actually slow your carpets drying, though.
Turn on your heat or air conditioning: Depending on the time of year, you can use either your heat or A/C to dry your carpets faster. Using your A/C may seem counterproductive but the improved air flow will still help dry your carpets, albeit less than using heat or opening your windows. The biggest downside of using your A/C is that the room may feel stuffy due to the increased moisture in the air. We recommend running a fan even if you use this method.
Use a carpet cleaner with Express Clean or Quick Dry Mode: Carpet cleaners like our ProHeat 2X® Revolution® upright deep cleaner, have a special cleaning mode that provides a lighter clean than standard modes. By releasing less formula and water with each pass, your carpets can dry in about 30 minutes!*
*Express Clean Mode - Reference instruction in user guide. Tested on new carpet with protectant. Results may vary.
Step 8: Vacuum Leftover Debris and Hair
Cleaning your carpets will bring extra hair and debris to the surface of your carpet. Once your carpets are dry, make sure to vacuum them one last time before moving your furniture back in place.
Got Questions? We’ve Got Answers.
How Often Should I Clean My Carpets?
We recommend cleaning your carpets at least twice a year. Regular carpet cleaning can help maintain the look and feel of your carpets longer as well as help remove pollen allergens from your home.
How Do I Know if I Can Use a Carpet Cleaner on My Carpet?
Where should you look if you’re not sure if your carpets can be cleaned? Our recommendation is to start with the manufacturer. Typically, they will tell you if your carpets can be cleaned right on their website. If you can’t find the information on the product’s page, you may be able to contact your manufacturer through their support portal. If you purchased your carpet through a retailer, you can still follow the steps above.
Want to Learn How to Tackle These Tough Messes?
Cleaning your carpets can turn from a chore into something you take pride in, once you’re set up for success. Follow this how-to and you’ll have a healthy routine every time a stain strikes. We’re here to help if you have questions about any of our cleaning tips or our products. To see an in-depth video demonstration, click here. Happy cleaning!